Skirting Clearance for High-Wind Tie-Downs
Okay, Let’s Set The Distance for The Front Edge of High-Wind Tie-Downs
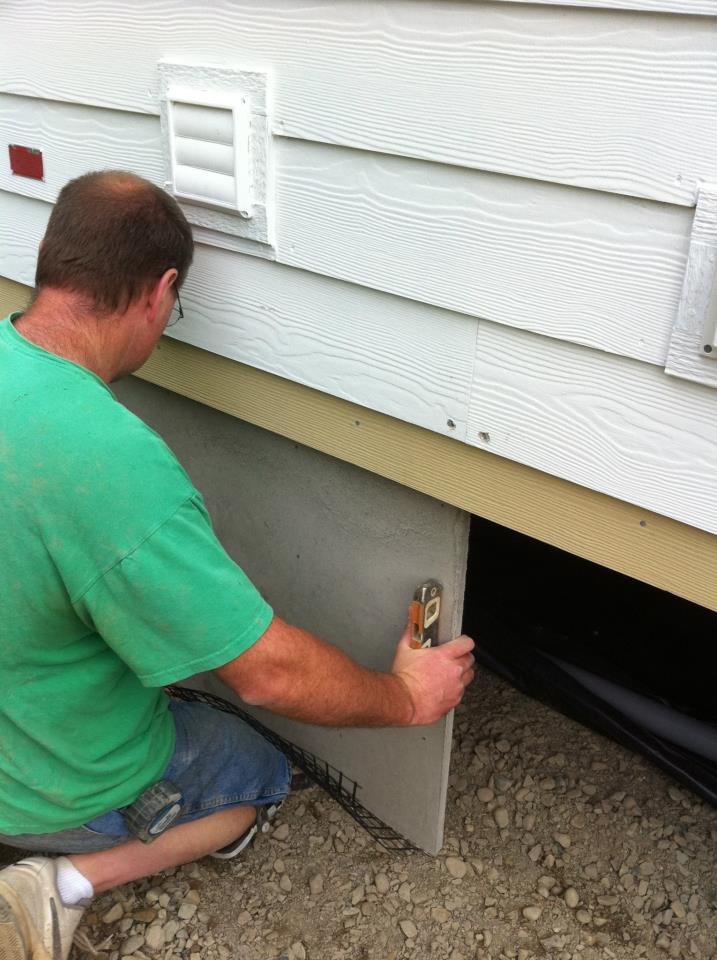
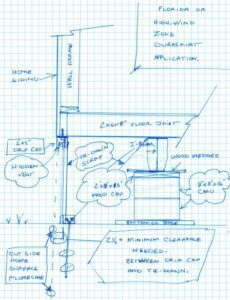
High-Wind or Hurricane Tie-Downs can pose a problem with skirting your manufactured home. That’s due to the extra strapping that is fastened to the front of your homes’ rim-joist or floor framing. Since, pictures are worth a thousand words we have a drawing and photos in order to aide you in understanding what you need to do. Furthermore, for those that prefer we explain step by step please follow these directions.
- Chose a skirting material but in this case we will be explaining the use of DURASKIRT™.
- After the home setup and before adding High-Wind Tie-Downs install 2″ x 2″ drip metal around the bottom of your home. (Photos shown below).
- Now install the High-Wind Tie-Downs, also shown in the photos, although carefully considering the tie-down materials must be set at least 2 1/2″ behind belly-band trim or backside of drip cap metal (photos below).
- If using drip metal the L-shaped bracket securing the tie-down to exterior rim-joist (framing) will need to be bolted through drip metal into floor framing. This is shown in detail drawing.
Now that you followed these steps begin using the DURASKIRT™ manual for a successful installation.
Photos showing High-Wind Tie-Downs.
Photos depicting Drip cap and hidden-venting.
You will need 2 1/2″ clearance from the face of Drip cap or behind belly-band (siding) to back of DURASKIRT™ CMU panels.


Recent Comments